Once detectable warning tiles are installed, a final review can catch issues that aren’t always obvious during construction. A tile may look finished at first glance while placement, alignment, anchoring, surrounding concrete, drainage, or another detail still deserves attention.
Inspection also creates a useful baseline for future maintenance. Knowing how a detectable warning surface looked and performed when it was new makes it easier to recognize damage or deterioration later.
What should an inspector actually look for? The answer depends on the product, installation method, project specifications, and requirements governing the site, but the following checkpoints provide a practical place to start.
Before You Inspect: Know What Was Supposed to Be Installed
The best inspection reference isn’t another installation down the street. It’s the documentation for this specific project.
Before evaluating the finished work, review the approved plans, specifications, product submittal, and current manufacturer installation instructions as applicable. Together, these documents establish what was selected and how the installation was intended to be completed.
Confirm details such as:
- Product and material
- Tile size and configuration
- Color and finish
- Installation method
- Limits and location of the warning surface
- Any project-specific layout or detail
- Special conditions, such as radius installations
This gives the inspection a defined benchmark instead of relying on assumption.
Step 1: Look at the Installation as a Whole
Before getting down to individual domes, stand back and look at the entire warning surface in relation to the pedestrian route.
Does the installation match the intended location and configuration shown in the project documents? Does the warning field appear complete and consistently aligned? Are there unexpected gaps, cuts, offsets, or changes in orientation?
Verify Placement and Coverage
Detectable warnings are required at specific locations and have dimensional and placement criteria that vary with the application. A correctly manufactured tile won’t correct an installation that begins or ends in the wrong place.
The inspection should therefore confirm the finished warning area, not simply the condition of individual tiles.
Depending on the project, this may include checking its relationship to a curb line, blended transition, platform edge, pedestrian island, or other feature.
Check Alignment and Orientation
Look across the installation for tiles or sections that appear skewed, misaligned, or inconsistent with the approved layout.
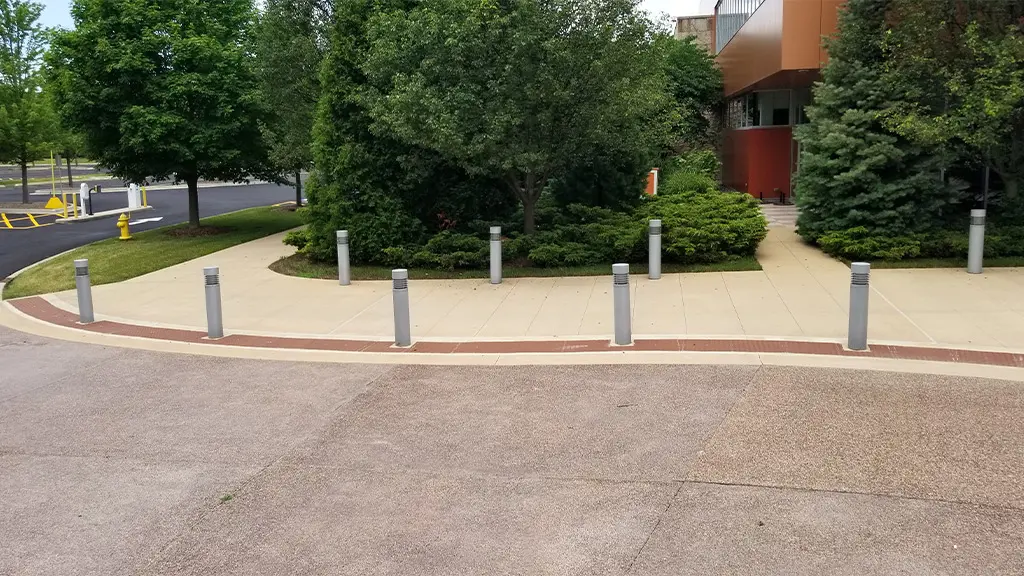
Curved installations deserve particular attention. Radius curb ramps may use specially configured tiles and wedges so the truncated-dome field follows the curve rather than being improvised from straight rectangular tiles.
Step 2: Examine the Tactile Surface
Next, look more closely at the part pedestrians actually encounter.
Truncated domes should form the intended tactile pattern across the warning area. Inspect the surface for visible damage that could interrupt or alter that pattern.
Look for Damaged or Missing Domes
Check for domes that are cracked, broken, flattened, excessively worn, or otherwise damaged.
A small cosmetic mark and damage to the tactile geometry aren’t necessarily the same thing. The question is whether the condition affects the integrity or intended function of the surface.
If damage is present, document its location and extent so the project team can determine the appropriate corrective action.
Check the Finished Surface
The type of surface condition to look for depends partly on the material.
A coated metal tile may warrant inspection for damage to the finish. Polymer and cast iron have different material and surface characteristics. The relevant product documentation can help distinguish expected characteristics from conditions that warrant further evaluation.
This is another reason inspection criteria shouldn’t assume all detectable warning materials age the same way.
Step 3: Check Tile Edges, Fasteners, and Stability
The perimeter and attachment points can reveal problems that aren’t immediately apparent from the center of the tile.
Walk around the installation and look closely at the transition between the detectable warning surface and the adjacent pavement.
For Surface-Applied Tiles
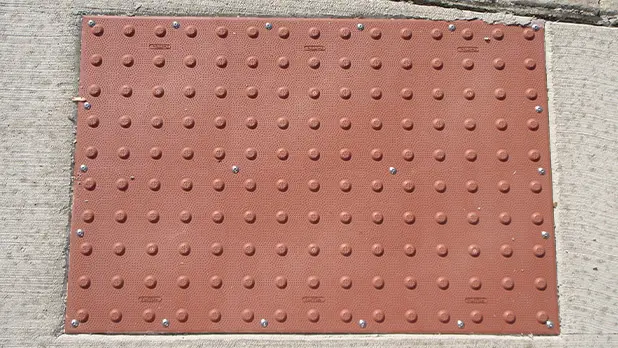
Surface-applied systems are installed over cured concrete using manufacturer-specified attachment methods. Depending on the product, inspection may include looking at mechanical fasteners, perimeter treatment, sealant, and overall contact with the substrate.
Watch for:
- Loose or visibly raised areas
- Damaged or missing fasteners
- Gaps at tile edges
- Deteriorated or incomplete edge treatment
- Movement when the tile is loaded
The manufacturer’s installation instructions should be the reference for how the particular system is intended to be secured.
For Wet-Set Tiles
Wet-set systems are incorporated into fresh concrete, so the tile-to-concrete relationship becomes an important part of the finished condition.
Look for irregular gaps, unsupported-looking edges, movement, cracking around the perimeter, or other indications that the tile and surrounding concrete may not be functioning as a stable assembly.
TufTile’s wet-set systems use a flat-back design intended to promote contact with the concrete and reduce air and moisture pockets beneath the tile. That makes proper concrete consolidation around the installed product an important part of overall installation quality.
Step 4: Inspect the Concrete and Pavement Around the Tile
Sometimes the tactile product isn’t where the problem starts.
The surrounding walking surface can influence the stability, drainage, detectability, and long-term condition of the entire installation. TufTile’s project materials specifically identify deterioration of surrounding concrete as something owners should monitor over time.
Look beyond the tile for conditions such as:
- Cracking or spalling
- Scaling or surface deterioration
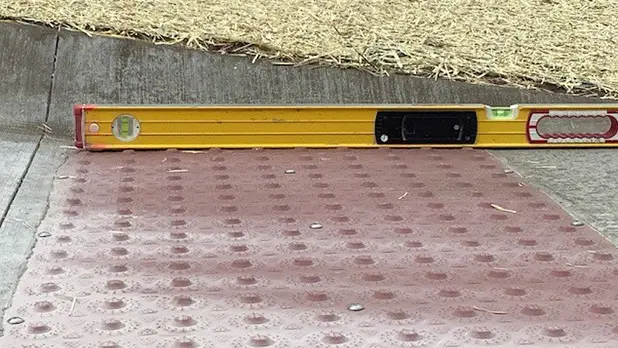
- Settlement or uneven transitions
- Damage along tile edges
- Joint problems
- Areas where water may collect
A durable tile installed within deteriorating pavement can still become part of a larger maintenance problem.
Pay Attention to Transitions
The transition between the tactile surface and adjacent pavement should also be examined for unexpected changes in elevation or deteriorating edges.
This is particularly relevant over time. Freeze-thaw activity, pavement movement, traffic, and maintenance operations can change the relationship between surfaces even when the tactile tile itself remains intact.
Step 5: Look at Drainage and Debris
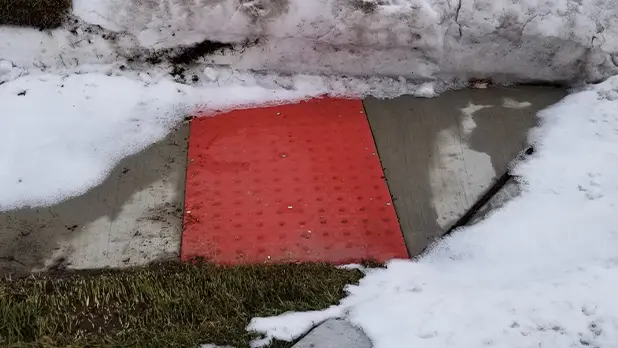
Water, sediment, leaves, snow, ice, and other debris can change the condition of an installed tactile surface.
Check whether drainage appears to move water away from the area as intended or whether the installation has created, or is adjacent to, locations where water routinely collects. Also look for material trapped between domes or along tile edges.
Routine cleaning is more than an appearance issue. Accumulated material can make tactile features less distinct and can conceal damage that would otherwise be visible during inspection. Current tactile-wayfinding guidance identifies cleaning and keeping tactile areas free of obstructions as part of ongoing maintenance.
Step 6: Evaluate Visual Contrast in the Finished Setting
A color sample reviewed during the early stages of the project doesn’t show exactly how the detectable warning surface will look once installed beside the finished pavement.
Post-installation inspection provides an opportunity to see that relationship in its actual setting.
Applicable accessibility criteria address visual contrast between detectable warnings and the surrounding walking surface. The final installation should therefore be evaluated in relation to the adjacent pavement rather than treating the tile color as an isolated characteristic.
Over the service life of the installation, this is also something worth revisiting. Changes in coatings, pavement, staining, repairs, or other surface conditions can affect the visual relationship that existed when the project was completed.
Step 7: Document What You Find
An inspection becomes more useful when it creates a record rather than ending with a visual walk-through.
For a new installation, documentation might include photographs, the inspection date, product information, observed conditions, and any corrective work that needs follow-up.
Create a Baseline for Future Inspections
Photographs of the completed installation can be particularly valuable later. They establish what the tile, finish, surrounding pavement, joints, and edges looked like when the system was new.
It can also be helpful to retain basic product information with maintenance records, such as the manufacturer and product or model number, color, size, installation method, installation date, warranty information, and the approved submittal documents.
If an individual component eventually needs repair or replacement, those details can make identifying the existing system considerably easier.
Inspection Should Continue After Project Closeout
The first inspection isn’t the last one that matters.
Outdoor detectable warning surfaces encounter pedestrian traffic, weather, maintenance equipment, dirt, snow and ice, deicing materials, moisture, and movement in the surrounding pavement. The conditions at a particular site determine which of those factors are most significant.
Periodic inspections can focus on changes since the previous review rather than repeating the construction acceptance process from scratch.
Conditions Worth Monitoring over Time
Maintenance teams can watch for:
- Broken or excessively worn tactile features
- Loose or damaged tiles
- Changes at fasteners or edges
- Finish wear or surface damage
- Debris that obscures the tactile pattern
- Cracking or deterioration in adjacent pavement
- Drainage problems
- Damage associated with maintenance equipment
- Changes that affect visual contrast
These conditions are consistent with the maintenance considerations identified throughout TufTile’s project resources and tactile-wayfinding guidance.
The appropriate response will depend on what is found. Cleaning may resolve one condition, while localized repair, replacement, pavement work, or further evaluation may be appropriate for another.
A Practical Post-Installation Inspection Checklist
For a quick field review, the process can be condensed into six questions:
- Is it where it should be? Compare placement, dimensions, configuration, and orientation with the approved project documents.
- Is the tactile surface intact? Look for missing, broken, excessively worn, or damaged raised features.
- Is the tile secure? Examine edges, attachment points, surrounding concrete, and any visible movement or separation.
- Is the surrounding pavement sound? Check for cracking, settlement, deterioration, joint issues, or other conditions affecting the installation.
- Is the surface clear and draining properly? Look for debris, standing water, blocked drainage, or other material interfering with the tactile field.
- Does the finished installation still provide the intended visual contrast? Evaluate the tile against the pavement as it actually exists on site.
If something doesn’t look right, the next step is to compare the observed condition with the approved project documents and manufacturer information rather than making a field assumption about the remedy.
Treat Inspection as Part of the System’s Lifecycle
A detectable warning installation isn’t finished from an asset-management perspective simply because construction is complete.
The post-installation inspection confirms that the work delivered to the owner matches the intended project. Later inspections answer a different question: Has anything changed that affects the condition or function of the tactile surface?
Keeping those reviews tied to the actual product, installation method, surrounding pavement, and site conditions creates a more useful maintenance history and makes it easier to identify when routine upkeep is enough and when repair or replacement deserves consideration.